 Waymark Nordic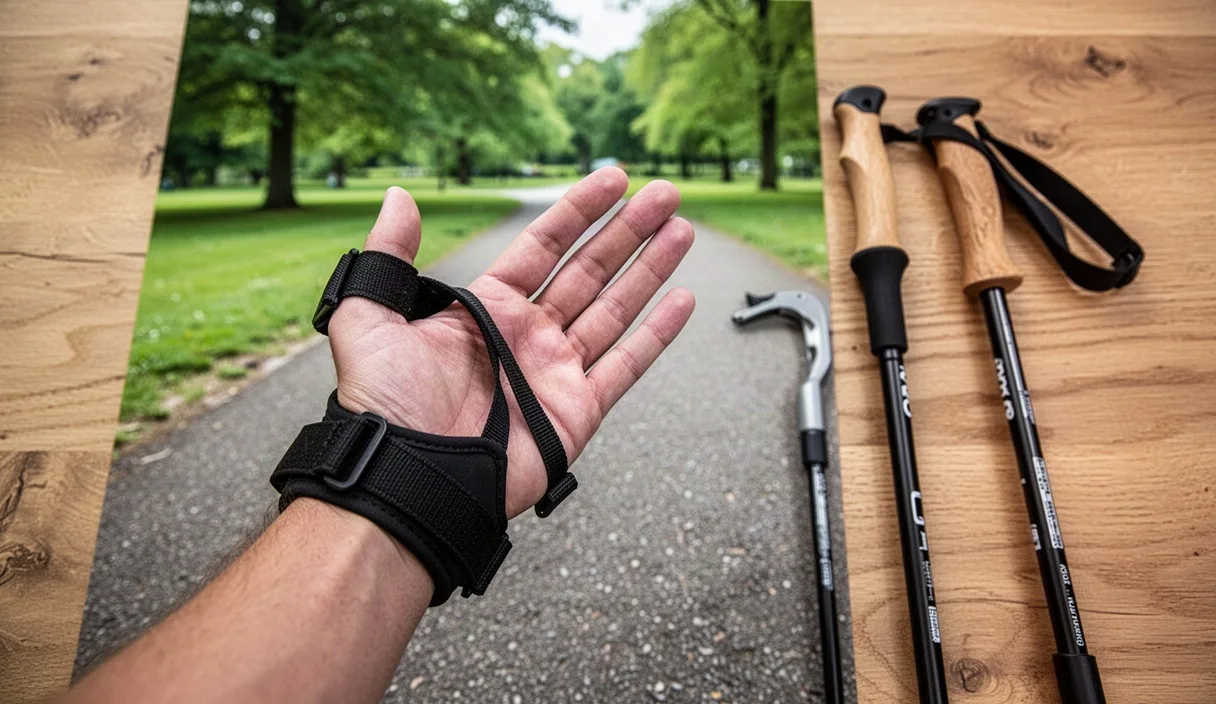
If you finish a two-mile walk with aching forearms, stiff thumbs, or white knuckles, you are carrying an invisible load. Many walkers pick up poles and treat them like ski poles on an icy slope or banisters on a rickety staircase. They squeeze the rubber or cork handles until their knuckles pale, believing that a tighter hold produces a firmer stride. In reality, that white-knuckle hold wastes energy and locks up your kinetic chain before you have even cleared the driveway.
Nordic walking relies on a cycle of grip and release that transfers force through an engineered strap system, not through the small muscles of your fingers. When your hands clamp shut, that muscular tension creeps upward into your wrists, elbows, biceps, and traps within minutes. Learning to soften your fingers is one of the quickest ways to walk further with less fatigue, protecting your joints while still moving briskly along the trail.
Why Death Gripping Slows You Down
The human hand contains more than thirty individual muscles, most of which control fine motor tasks rather than sustained heavy loads. When you hold a pole handle with sustained isometric force, blood flow to the forearm muscles drops noticeably. Within ten to fifteen minutes, lactic acid builds up, leading to forearm pump, wrist fatigue, and a sensation of leaden arms. This tension does not stay isolated. The flexor muscles of the fingers connect directly to the medial epicondyle of the elbow, which is why chronic over-gripping frequently mimics golfers elbow.
Mechanical efficiency also takes a hit. Nordic walking generates forward propulsion during the push-back phase, which occurs behind your pelvis. If your fingers refuse to open as your hand travels past your hip, your shoulder joint hits an artificial end-range around twenty degrees behind the body. To push the pole further, you are forced to lean forward from the lower back or twist your torso awkwardly. An open hand lets the wrist flex naturally, extending your backward push by six to ten inches per stride without straining your lower spine.
Furthermore, clenching your fists sends neurological feedback straight to your cervical spine. Try making two tight fists right now and notice what happens to your breathing and your upper trapezius muscles. Your breath becomes shallow and your shoulders hitch toward your ears. In Nordic walking, this tension acts like driving with the emergency brake partly engaged. You burn metabolic energy on unnecessary muscular contraction instead of smooth forward motion.
| Factor | Tight Death Grip | Relaxed Strap Push |
|---|---|---|
| Contact Point | Finger pads and palm friction | Strap cradle against heel of hand |
| Stride Extension | Poles stop near the hip line | Poles extend cleanly behind the hip |
| Forearm Fatigue | High; fatigue sets in within 15 minutes | Low; blood circulates freely |
| Joint Impact | Stress concentrates in wrist and elbow | Load distributes across back and core |
Setting Glove Strap Tension Correctly
Most hand tension begins before the walker takes a single stride. It starts at the strap closure. Modern Nordic walking poles feature a glove-style strap system, often labeled left and right, with an aperture for the thumb and a wide hook-and-loop closure across the back of the hand. If this strap is adjusted improperly, your fingers will automatically compensate by grabbing the shaft to keep the pole under control.
To find the proper fit, slide your hand into the harness with the strap lying flat against your skin. The wedge-shaped base of the strap should rest snugly across the fleshy pad between your thumb and index finger, known as the thenar space. Fasten the hook-and-loop band so it secures the pole to the heel of your hand without constricting your circulation. You should be able to slide one finger under the band at the wrist, but the strap should not slide up or down your arm when you pull backward.
Adjusting the tension properly involves a quick physical check:
- Check the thumb channel: Ensure the seam does not bite into the webbing of your thumb. If you notice red marks after five minutes, widen the channel or loosen the main wrap.
- Test the dangle: Let your arm hang by your side with fingers completely open. The pole handle should rest upright against the base of your palm, tilting back no more than fifteen degrees from vertical.
- Assess the reach: Extend your hand forward. If the strap pulls your wrist into an awkward bend before you touch the handle, lengthen the strap anchor at the pole connection point.
- Monitor swelling: Hands naturally expand on warm days or during brisk walking. Check the strap fit twenty minutes into your walk and loosen the closure by a few millimeters if your rings feel snug.
If you experience sharp nerve pain, numbness, or tingling in your fingers while wearing straps, unclip them immediately. These symptoms can indicate compression of the median or ulnar nerves, and a certified instructor or physical therapist should inspect your fit and wrist alignment.
Mastering the Open Hand Technique
The core movement of Nordic walking alternates between holding and letting go. You grip the handle gently as the pole plants into the ground in front of your back foot, and you open your hand as your arm sweeps past your hip. For many beginners, opening the hand feels like dropping their gear. It requires trusting the harness to support your backward push.
Think of the grip as a soft bird in your palm: squeeze too hard and you crush it, open too wide and it flies away. During the forward plant, your fingers curl loosely around the handle, with the index finger and thumb providing directional control. You do not need the pinky or ring finger clamped tight. As your body moves forward over the pole tip, the angle of the pole changes. Once your hand aligns with your hip bone, consciously open your fingers. The heel of your hand remains pressed firmly against the strap cradle, driving the pole backward without any finger involvement.
Here is how the hand should move through the four parts of a single stride:
- Plant: Hand is forward at roughly waist height, elbow slightly bent. Fingers are lightly closed around the grip, guiding the rubber pad or carbide tip into the ground at an angle of roughly forty-five degrees.
- Weight transfer: As your chest passes the pole handle, pressure shifts from your fingers to the strap. Your grip loosens naturally as your body weight bears down through the base of your palm.
- Push-off: Hand passes the outer hip seam of your trousers. Open your fingers fully, extending them toward the ground. The thumb stays relaxed beside the index finger rather than pointing outward.
- Recovery swing: As your rear arm reaches the end of its push, bring the arm forward again. The strap pulls the handle back into your palm. Close your fingers around the grip just as the tip touches the ground.
Relaxing Upper Shoulders and Neck
You cannot cure hand tension if your neck and shoulders are braced for conflict. The nerves that supply the hand, wrist, and forearm exit the spinal column through the cervical vertebrae and travel down through the brachial plexus underneath the clavicle. When your shoulders creep up toward your ears, these pathways can experience muscular compression, triggering a reflex that causes the hands to curl inwards.
Good shoulder carriage in Nordic walking does not mean pinning your shoulder blades together like a soldier on parade. Instead, focus on creating space between your earlobes and the tops of your shoulders. Think of your shoulder blades as flat plates resting gently against the back of your rib cage. They should glide forward and backward as your arms swing, rather than hiking upward on the forward reach.
To break the cycle of shoulder creeping while out on the path, use a physical reset every ten to twelve minutes:
- The exhale drop: Take a deep breath in through your nose, and as you exhale through your mouth, let both shoulders sink two inches lower than you think they should be.
- The thumb sweep: On your forward swing, check that your thumb passes close to your hip pocket. Swinging your arms wide away from your sides forces the upper traps to lift the entire weight of your arm.
- The chin check: Walkers often crane their necks forward to look at their pole tips. Keep your gaze directed fifteen to twenty feet down the trail. A neutral neck instantly reduces the load on your upper trapezius.
Drills to Practice on Soft Grass
Breaking a death grip while walking on pavement can be tricky because the firm surface makes people feel protective of their joints. Soft grass or a flat dirt meadow provides a forgiving surface where you can drop your poles without damaging the tips or scuffing the shafts. Set aside ten minutes on a lawn before your next long trek to run through these technique drills.
Start with the Ghost Drag drill. Fasten your straps as normal, but do not touch the pole handles at all. Let your arms hang loose at your sides, fingers completely extended and pointing toward the grass. Begin walking at a comfortable pace. The poles will trail behind you on the grass, angled back at roughly forty-five degrees. Focus on swinging your arms naturally from the shoulders like pendulums. Notice how the poles follow along without you holding them. After fifty strides, slowly bring your hands to the handles without squeezing, maintaining that loose, swinging sensation.
Next, practice the Coin Hold exercise. Place a clean coin or a flat pebble between your thumb and the top rim of the pole handle, while resting your palm against the strap. Walk for sixty paces focusing solely on keeping that coin in place without wrapping your remaining four fingers around the grip. Your fingers should flutter loosely in the air. This drill isolates the push mechanism: you will feel immediately that propulsion comes entirely from the heel of your hand driving the strap backward, while the fingers do zero work.
Finish with the Pencil Tap cadence drill. As your hand reaches the front of the swing, tap your index finger three times lightly against the handle before planting. This conscious, rapid movement makes it impossible to lock your hand into a static grip. If you can tap your fingers rhythmically, your forearm muscles are relaxed. Alternate twenty paces of tapping with twenty paces of normal, fluid walking until the tension stays away.
Common Mistakes
Even seasoned walkers slip back into poor habits when trails become steep or uneven. Identifying these mechanical missteps early keeps tension from turning into chronic joint soreness.
- Grabbing on the backswing: Some walkers release the grip at the hip but snap their fingers shut again behind them before swinging forward. Keep the hand open through the entire backward thrust until the arm swings forward past the leg.
- Straps anchored too loose: If the glove harness wobbles on your wrist, you will instinctively clamp your fingers shut to keep the handle upright. Snug the strap so you can trust it.
- Planting ahead of the body: Reaching the pole out in front of your lead foot creates a braking force that jams the wrist joint. Plant the pole roughly level with your trailing heel or opposite midfoot.
- Bending the wrist on push-off: Cocking the wrist backward or flexing it hard sideways strains the carpal tunnel. Keep a straight line from your elbow through your forearm and into the base of your palm.
Next Steps for Smoother Strides
Fixing hand tension requires conscious repetition over several outings. During your next three walks, do not worry about speed, distance, or heart rate zones. Pick an easy, level route and devote your attention entirely to the physical sensation in your palms and wrists. Begin each session with two minutes of the Ghost Drag drill across an open patch of lawn to reset your muscle memory.
Use structural landmarks to keep your technique honest. Every time you pass a park bench, trail marker, or street corner, perform an intentional hand check: wiggle your fingers, let your shoulders drop, and take a long, smooth exhale. Over time, the open hand push becomes second nature. If persistent wrist aching, numbness, or joint swelling continues despite correct strap adjustment and proper form, stop pole walking temporarily and schedule an evaluation with a healthcare professional or qualified sports physical therapist to check for underlying tendon or nerve irritation.