 Waymark Nordic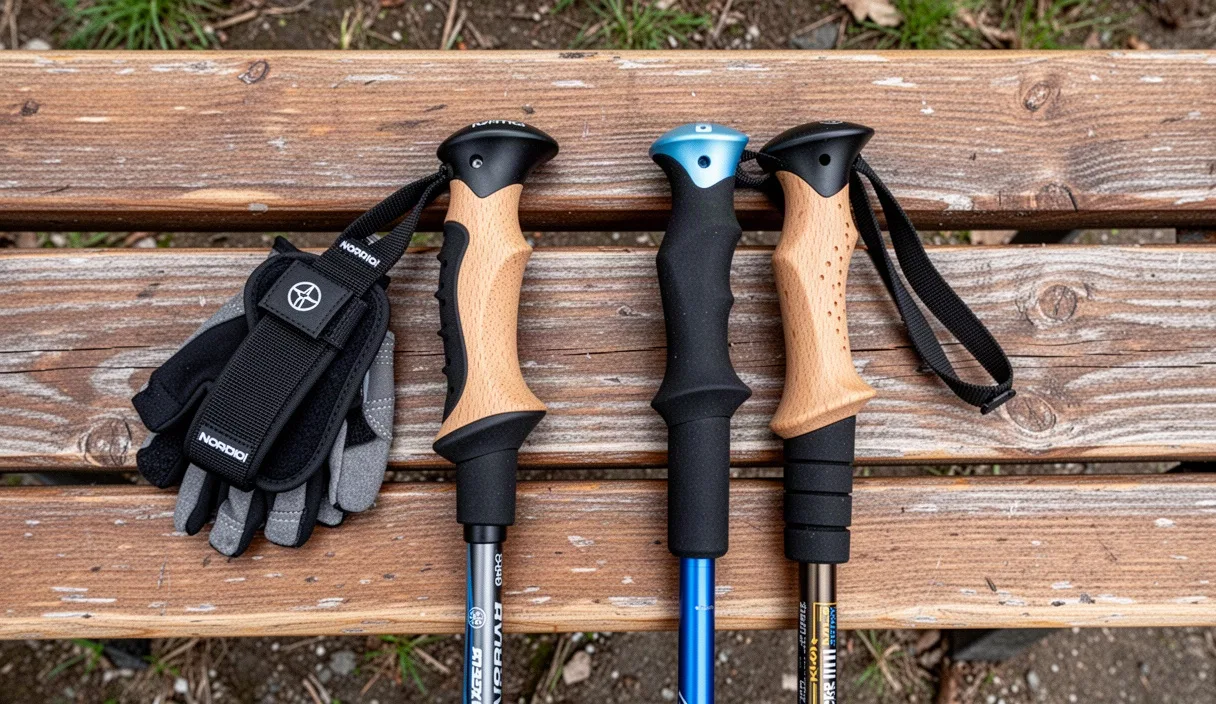
At first glance, all walking sticks look like close cousins. If you stand a Nordic walking pole next to an alpine trekking pole in an outdoor shop, both appear to be slender sticks made of metal or composite tubing, capped with handles and pointed tips. Yet placing the wrong pair in your hands on a morning workout or a mountain traverse quickly reveals that they serve entirely different masters. One is designed to propel you forward on flat or rolling terrain, while the other is built to catch your weight and keep you upright on steep, uneven ground.
Choosing between them comes down to biomechanics, terrain, and how you want your upper body to interact with the ground. Grabbing trekking poles for a fitness walk across city asphalt leads to awkward arm movements and noisy slips, while taking featherweight Nordic fitness poles up a scree field can leave you without the lateral stability you need. Understanding the hardware differences helps you pick the right tool for your specific miles.
Grip Shape and Wrist Straps
The interface between your hand and the pole tells you almost everything about its intended purpose. Trekking poles use upright, contoured grips often molded with finger grooves, an ergonomic flare at the base, and an angled head. These grips are usually crafted from dense EVA foam or natural cork, giving your palm a broad surface to press down against during steep descents. The simple ribbon strap hanging from a trekking pole exists primarily to keep you from dropping the pole down a ravine, and to allow a gentle transfer of wrist load when pushing down on ascents.
Nordic walking grips, by contrast, are slim, straight, and smooth. They lack pronounced finger grooves because your hand does not clamp onto the handle through the entire stride. Instead, the handle works as a guide. The real engine of a Nordic pole is its harness strap, which resembles a fingerless glove. This harness wraps snugly around your palm and locks your thumb into place with a hook-and-loop closure, anchoring the base of your hand directly to the pole shaft.
| Feature | Trekking Poles | Nordic Walking Poles |
|---|---|---|
| Grip Profile | Contoured, flared base, textured finger shelves | Slim, cylindrical, smooth cork or composite |
| Strap System | Loose webbing loop with adjustable slider | Form-fitting glove harness with thumb slot |
| Hand Action | Continuous closed grip for balance and weight transfer | Open and close cycle: push back, release, catch forward |
| Quick Release | Rare, straps are fixed to the handle crown | Common click-out button to detach glove from handle |
During a proper Nordic stride, you push backward through the strap and open your fingers completely behind your hip. The harness supports the force of your push, allowing you to extend your arm fully without dropping the equipment. When you swing your arm forward again, the strap pulls the grip right back into your waiting palm. Many Nordic poles feature a quick-release button at the top of the handle, so you can click your hand free to blow your nose, tie a shoe, or check your watch without unpeeling the velcro harness.
Shaft Materials and Flex
How a pole responds to impact determines how your wrists, elbows, and shoulders feel after five miles. Trekking poles prioritize sheer vertical weight bearing and packability. Most trekking models use three telescoping sections connected by external lever cam locks or twist locks. This design allows a 130-centimeter pole to collapse down to 62 centimeters to lash onto a backpack. Aircraft-grade aluminum alloys, such as 7075-T6, are standard here because aluminum bends under catastrophic load rather than snapping instantly, allowing a hiker to limp down a mountain safely.
Nordic walking poles prioritize vibration absorption, swing weight, and continuous rhythm. Fixed-length shafts are the gold standard for dedicated Nordic walkers. Without overlapping adjustment sleeves and heavy cam-lock hardware, a fixed shaft weighs significantly less and stays balanced near your hand. While entry-level Nordic poles use aluminum, higher-grade models use carbon fiber composites ranging from 30 percent to 80 percent carbon content, with top-tier models using pure high-modulus carbon.
Carbon fiber dampens the high-frequency vibration generated by thousands of repeated strikes against firm gravel and asphalt. When an aluminum pole strikes pavement repeatedly, it sends a noticeable buzz up the shaft into your forearm tendons. Carbon deadens this oscillation within milliseconds. However, carbon does not tolerate being wedged between granite boulders and levered sideways; under sharp angular strain, it can crack. For pure walking paths and park trails, the light swing and clean dampening of carbon make fixed-length Nordic shafts remarkably efficient.
Tips, Baskets, and Rubber Paws
Look at the bottom end of each pole, and the operational differences become impossible to miss. Trekking poles terminate in a symmetrical, round carbide or tungsten tip housed within a sturdy plastic ferrule. Just above this tip sits a threaded mount for interchangeable baskets: small 35-millimeter discs for mud and scree, or wide 80-millimeter discs designed to keep the pole from sinking through deep winter snow. Trekking poles enter the ground vertically or near vertical, so a round tip provides multi-directional grip in dirt, mud, and river gravel.
Nordic walking tips are specialized for forward propulsion at an acute angle. A Nordic pole hits the ground behind you at roughly 45 to 60 degrees. To bite into unpaved dirt and firm trails at this angle, the bare metal tip is often shaped like a claw or a chiseled fang. This shape digs into soil cleanly without skittering forward, providing a secure anchor point from which you push your body ahead.
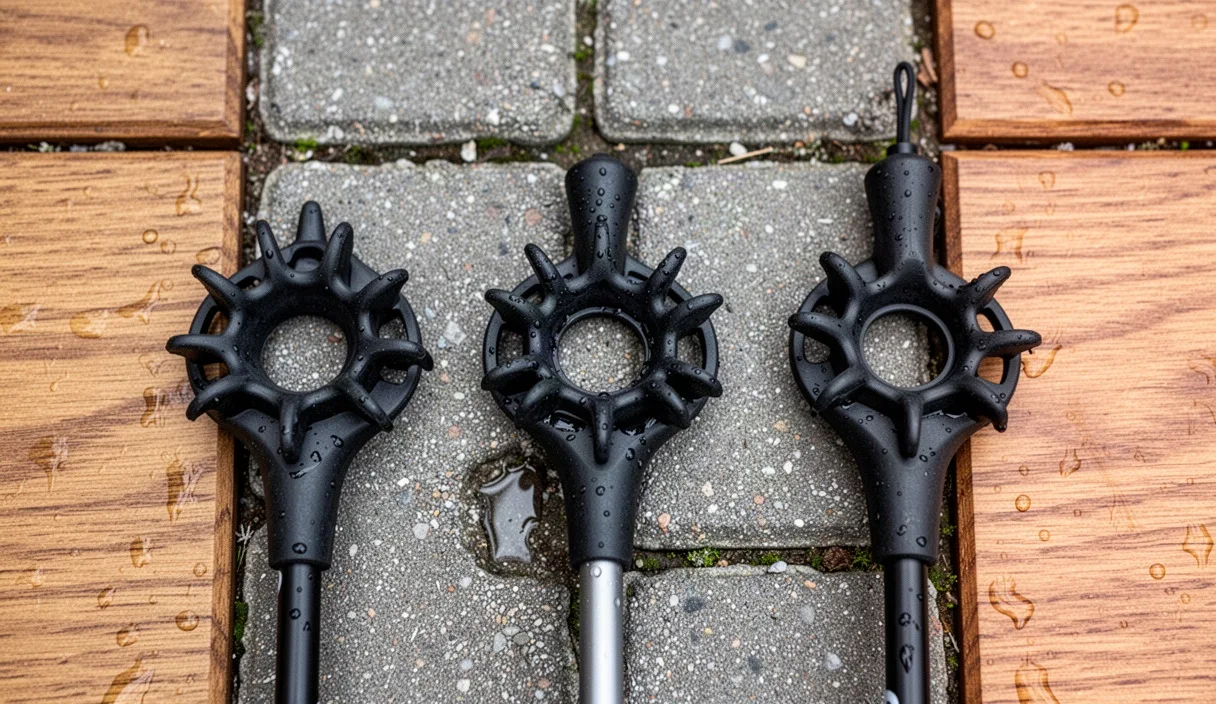
When you transition from dirt to asphalt or paving stones, a Nordic walker snaps on an angled rubber boot, usually called a paw:
- Angled tread: The paw is shaped like a miniature shoe, with directional tread on the base that mirrors the pole angle as you push off.
- Shock dispersion: The vulcanized rubber deadens the metallic tap on concrete and absorbs the impact before it reaches your lower arm.
- Proper orientation: The toe of the rubber paw must point backward. If it spins around and faces forward, the pole slips out from under you instantly.
Trekking poles also come with rubber caps, but they are generally round, blunt rubber stoppers designed to cover sharp points during transport or to prevent scratching rock faces. Walking briskly on concrete with trekking stoppers feels clumsy because the flat bottom of the round stopper fights the natural angle of your arm swing.
How Each Style Affects Your Gait
The mechanical difference in equipment fundamentally alters how you walk. Trekking pole technique is defensive and reactive. You place the poles forward and slightly to the sides, using them to create four points of contact with the earth. On an incline, you plant both poles ahead and pull yourself up; on a steep descent, you place them ahead to absorb braking forces, sparing your quadriceps and patellar tendons. The elbows stay bent near 90 degrees, and the poles remain upright or angled slightly backward toward your feet.
Nordic walking technique is active and continuous. Derived from cross-country ski training, it turns normal walking into a whole-body fitness session. Your arms swing naturally from the shoulder, remaining relatively straight with only a soft, relaxed bend at the elbow. The pole tip never plants ahead of your lead foot. Instead, it strikes the ground diagonally, roughly midway between your front and back feet.
To execute the Nordic movement pattern, focus on three sequential mechanical cues:
- Plant behind the center line: Swing your arm forward like a gentle handshake. Let the pole tip land on the ground angled backward at roughly 50 degrees, adjacent to your back heel or mid-stride.
- Push through the harness: As your torso moves over the pole, press firmly down and back against the glove strap. Do not choke the plastic handle; drive your power straight through the strap fabric.
- Open and release: As your hand passes your hip, release your fingers. Extend your arm back in a long, clean line until your hand is open behind you, driving your body forward. As the trailing arm begins its forward swing, curl your fingers back around the handle to reset the loop.
This dynamic stroke demands active rotation from your thoracic spine and chest. If you have chronic joint conditions, balance disorders, or back pain, consulting a physical therapist before changing your stride is wise, as the rotating push transfers movement loads across your entire upper back.
Which Pair Belongs in Your Kit
To choose between these two styles, look at where you spend your time and what you expect from your outings. Neither is universally better, but each excels in its native environment.
Trekking poles belong in your kit if you carry a loaded backpack, navigate mountain routes, or walk over unpredictable off-trail surfaces. If your route features tree roots, loose talus, stream crossings, or steep gradient shifts where you need to adjust shaft length on the fly, trekking poles provide stability and fall protection. Shortening your poles by 10 centimeters for a steep climb, and lengthening them by 10 centimeters for a steep descent, is an essential mountain skill.
Nordic walking poles belong in your kit if you walk for cardio fitness, endurance, posture improvement, or daily exercise on firm paths, gravel canal banks, and asphalt streets. They engage the lats, triceps, and abdominal muscles far more intensely than trekking poles. Carrying a true Nordic pole on a four-day wilderness backpacking trip will frustrate you, just as carrying bulky three-piece trekking poles on a brisk suburban five-mile fitness loop will feel clunky and slow.
Common Mistakes
Many walkers mix techniques or buy the wrong accessories without realizing it. Here are four regular errors to avoid:
- Setting pole length incorrectly: A trekking pole is usually set so your elbow forms a 90-degree angle when holding the grip vertically. A Nordic walking pole is sized with a formula: multiply your total height in centimeters by 0.68. If you stand 175 centimeters tall, your Nordic pole should measure approximately 119 centimeters, landing somewhere between your navel and sternum.
- Clamping the Nordic grip: Holding a Nordic pole with a white-knuckle death grip throughout the entire stride fatigues your forearm muscles and ruins the propulsion mechanic. Trust the glove harness to do the work.
- Planting trekking poles too far forward: Reaching far ahead with a trekking pole on flat ground acts as a brake, slowing your momentum and jarring your shoulder joint.
- Leaving paws on dirt: Walking on soft trails with rubber paws attached blunts your traction. Pop the rubber paws into your pocket when you hit soil, and let the bare claw tips bite into the ground.
Taking Your Next Steps
Before purchasing, measure your height in your typical walking shoes. If your primary goal is conditioning on urban park loops, search specifically for dedicated Nordic walking poles with removable glove harnesses and carbon shafts, rather than general hiking poles. If possible, try a pair with a 50 percent or higher carbon blend to ensure good vibration control on hard ground.
If you already own trekking poles, do not attempt to force them into a Nordic fitness routine by buying aftermarket slip-on rubber boots. The strap and grip geometry will not allow a clean open-palm release. Keep your trekking poles dialed for the backcountry, pick up a true pair of Nordic shafts for neighborhood training, and let each tool do the job it was built to do.